Showing posts with label Coat. Show all posts

Friday, February 5, 2016

Vintage Plaid Jacket: Simplicity 3622


Oh hey 2016, how would you like a blog post? I've been making things this whole time but my pictures have not been cooperating. But this coat is too cute not to show off! 


The pattern is a vintage one I scored off of Etsy, Simplicity 3622. I shortened it so it would end at the hip. This is my first time really jumping in and working with plaid. I just haven't been that into it, but this wool is irresistible. Working at a fabric store is dangerous, every time I walked by the wool section I could picture the coat in my head. I wanted a classic jacket, and this black and white plaid is perfect for it. Cutting it out was a bit nerve-wracking. There is a lot to think about, what needs to match up and where to line up the bolder stripe.


I cut out the wool using the tutorial from Sewaholic. Pinning the plaids stripes together so you can cut the pieces doubled. This was easy and all of my pieces are identical. Then I just made sure my notches were at the same spot for pieces that would be connected.


The welt pockets went in easily, I followed the directions that came with the pattern, Vintage patterns have the best directions. They don't skip over steps to make it "Sew Easy". For the bags of the pockets I used black pocketing fabric I bought from etsy. 


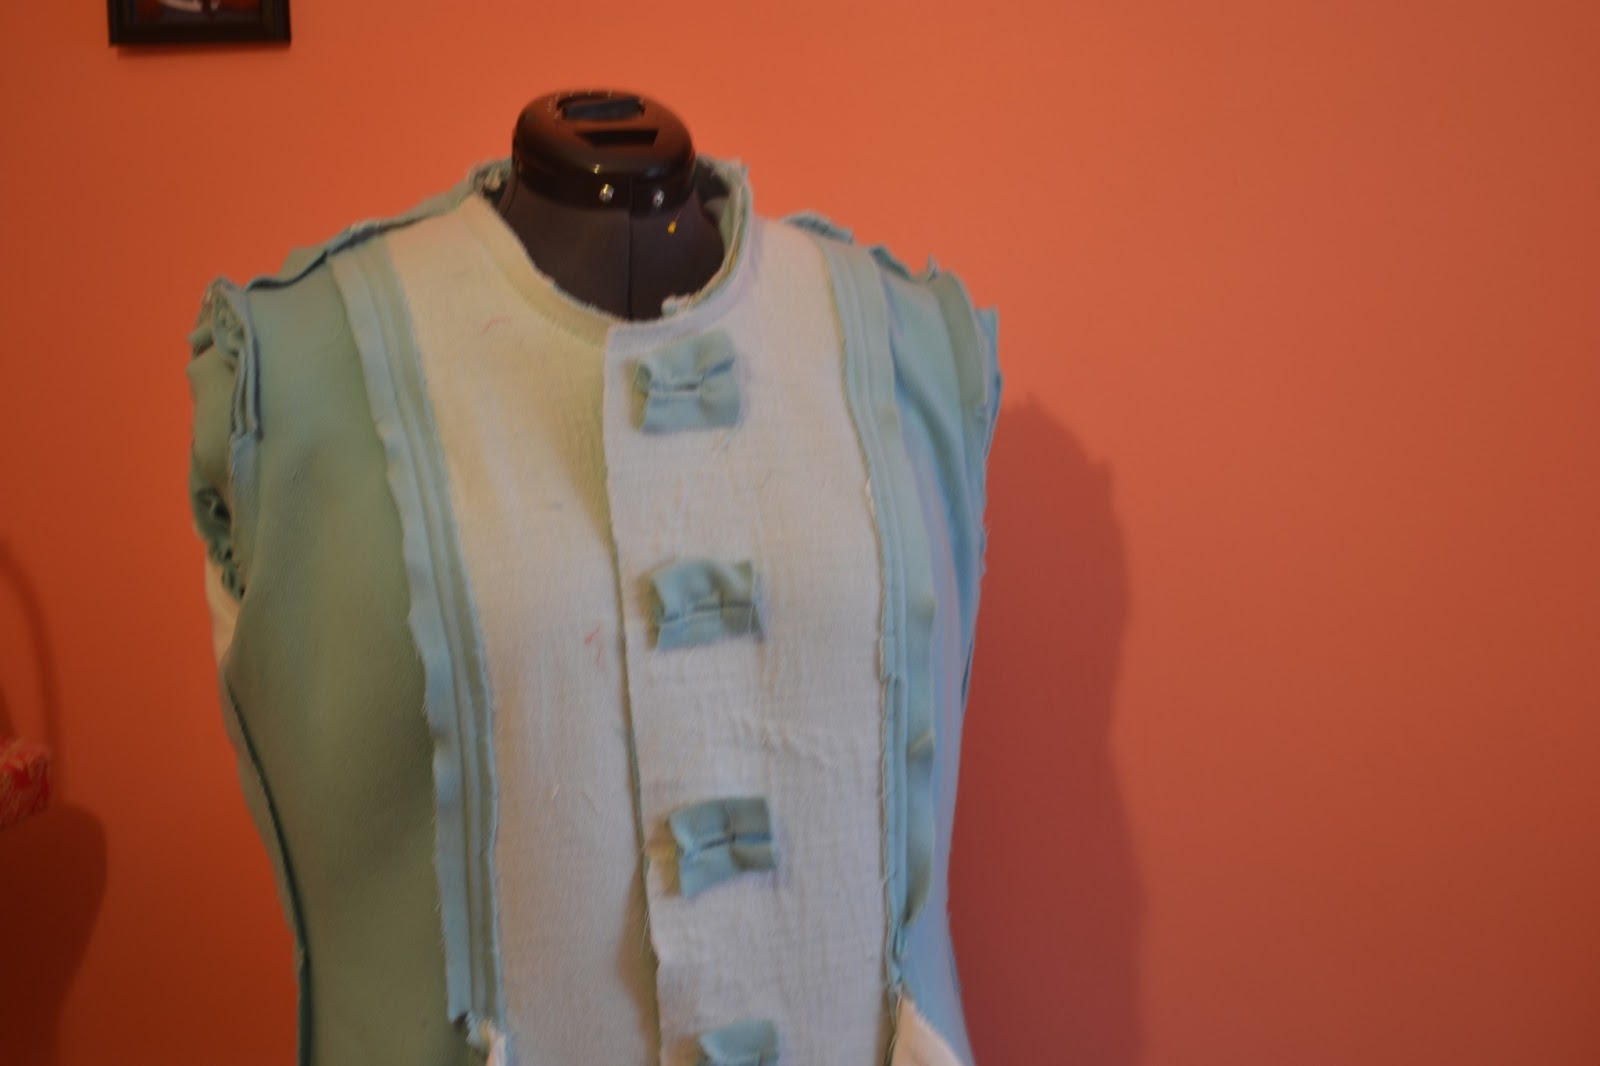
For the interfacing I mainly followed the pattern's directions are using muslin for interfacing and basted it on. I used fusible interfacing for the peter pan color, and the hems. The sleeves were eased in trying to match the stripes up as best as possible. Then I added the sleeve heads.


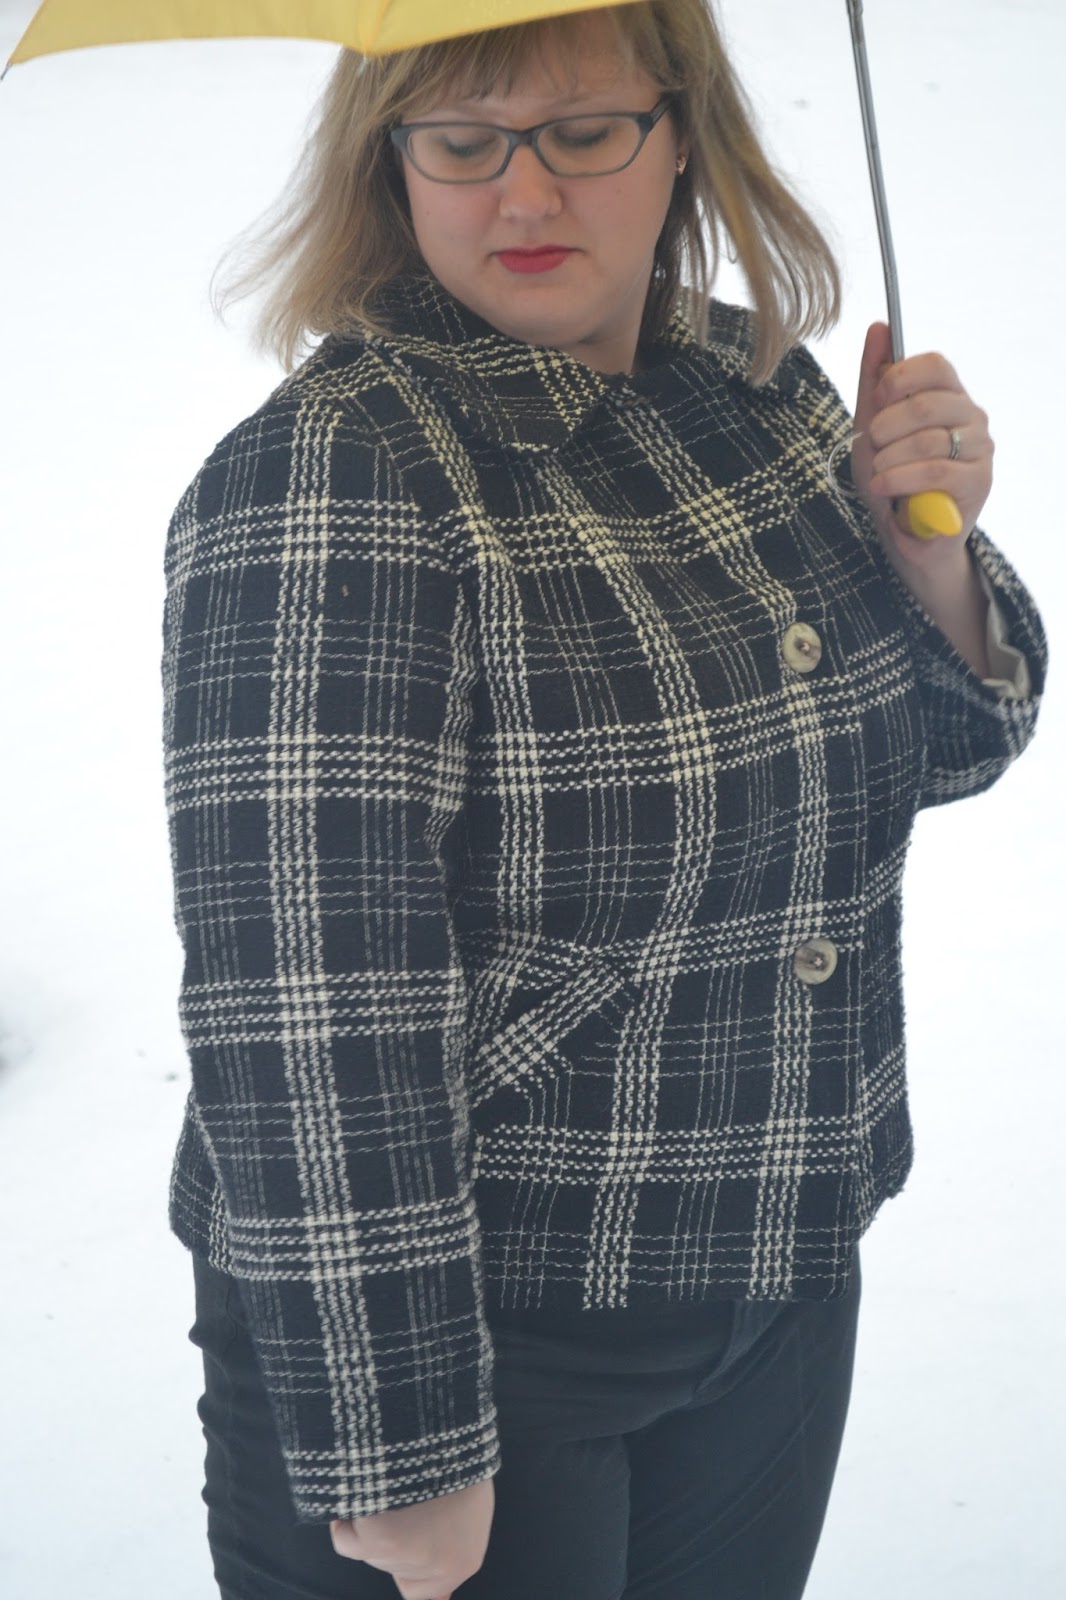
The buttons were difficult to pick out. Black, just faded away, different colors weren't working so eventually I picked these tan buttons. That's the good thing about working at a fabric store, you can obsess over buttons everyday until you finally pick the right ones. 


The lining is a sunback satin in a cream color. The coat is warm but not a full on winter coat warm. I wanted it to fit over some of my bulkier sweaters so that will keep me extra warm. The pattern included directions to add the back pleat, something which is missing from most of new the coat patterns I have seen. I always add a pleat and a back stay out of muslin. 


Well I'm glad to be finally finished with this jacket, and hopefully it will stop raining/snowing so I can wear it!

Pin It Now!

Wednesday, January 22, 2014

The Sequin Trench Coat: Vogue 8884


It's finished! My sequin trench coat is finished! I finished it this Saturday and quickly went to the closest train station to take pictures, and the train just happened to pull up. It was a very chilly day and the coat did little to keep me warm but I looked glamorously cold. The sequined pieces are lined in flannel, and the coat is lined in a teal bemberg rayon. 


I love the way it fits, stressing over my muslin fit really payed off. I kept the coat true to the original pattern but I omitted the straps on the sleeves, and added a tab on the shoulder. The hardest part about sewing this was the buttonholes. I had to sew them through some tearaway interfacing to get the thread to stay even with the uneven sequins. They even got stuck at the front seam, and I had to rip out a buttonhole and start again. GRR. 


Now that this coat pattern is fitted I might even make it out of a more practical fabric! or maybe not, it's more interesting to be unpractical. The coat is now on display at Fabricland, where I work, hopefully it will inspire someone to make something else out of sequins. 


Pin It Now!

Wednesday, January 15, 2014

Sequin Trench Coat

Source

 I don't know where I came up with this idea but all of the sudden I NEEDED to sew a sequin trench coat. I fought it for a while but i finally gave in and got the fabric a little before Christmas. I found some inspiration on pinterest. The above picture is a Burberry trench from a few years ago, I can't image how much that would cost. The black trench below is a vintage stunner, and I think my version will look more like this. It has more of the elements of the classic trench coat but done in that fabulous sequined fabric. 
source

I picked the classic trench pattern Vogue 8884 (version 3), and spent a lot of time on the muslin. The shoulder, and armholes were way too big, and it took a while to get the fit down. I chose a silver sequin that form a circle shape. It's very thin, the sequins are sewn on netting, so I backed all the sequin pieces with cotton flannel. The facings, undercollar, and collar stand are made in a  silver silk, because the sequins would be uncomfortable touching the skin.

Its not hard to sew sequins, its just a matter of choosing the right needle. I used a microtex in a size 14. I broke a few in the beginning until I got the right one.
Vogue 8884


If you follow me on instagram (erikamadeit), you have seen a sneak peek of the process. I plan on finishing this week. Its all hemmed, I just have buttons and buttonholes to go! Pin It Now!

Wednesday, February 6, 2013

Finished Project: Abbey Coat


It's finally finished, and I love my coat! Yesterday my husband and I traveled north to visit his parents and stumbled upon this horse farm in the snow. Turns out the be the perfect setting for some pictures of my coat!

The Abbey coat, a Jamie Christina pattern, is the perfect girly winter coat. I used a gorgeous blue wool from Mood in NYC, white sunback lining, and my favorite thing covered buttons from Pat's custom buttons and belts. I made some changes to the pattern, made the sleeves 2 inches longer and added pockets. After all what is a coat without pockets? I added them to the princess seams in the front, they may be a little bulky, but it would drive me crazy without them. 

I love the flounce,  which I did not interface, I was afraid that it might look like a tutu! I used all of my regular tailoring techniques: bound buttonholes, padstitching the collar, hand pickstitching, and topstitching. Making a coat is a lot of work but it is so worth it when you get it right. The coats in the department store seem like blankets compared to the weight and structure a tailored coat has.  I just love the results, it feels really special, and I can't wait to wear it all winter.


See the rest of my coat posts here, here and here

Pin It Now!

Friday, February 1, 2013

Gratuitous Coat Post


I've been toiling away on my abbey coat, and am nearing the end. Hopefully, I will finish it this coming week but in the meantime wanted to share some shots of the inside. 


Padstitching the collar

I added pockets on the princess seam!
Also you can see the bound buttonholes here

Set in sleeve using a bias strip

Lining

Sunback lining


So close to done!
Off to go sew some more 
Pin It Now!

Tuesday, January 15, 2013

Abbey Coat Muslin

I'm slowly crawling out of the black hole of flu that's been going around. I haven't done anything constructive for 5 days,but today I finally felt up to finishing my coat muslin. 

Most of the pieces I cut from some green felt fabric I had to simulate the weight of wool, and the rest in just muslin fabric when I ran out of felt. I think the fit is good, but not great. The upper sleeve is too tight, and I'm not really sure how I feel about the sleeve length for winter. I may lengthen them. It seems to be bunching a little bit around the upper  breast, I supposed a full bust adjustment would fix that. Or maybe it's just a result of the too tight sleeve.  It felt good on, but now looking at these photos it looks kind of blah. Maybe it's just because I'm feeling blah. 

Any fitting suggestions? Anyone else just feeling blah today?


Pin It Now!

Thursday, January 3, 2013

I'm Coat Crazy!


I'm starting another coat! I've always had a serious addiction to coats, and now I'm addicted to tailoring and the two combined is impossible to resist. The pattern is the Abbey Coat from Jamie Christina, who I never knew about before I spotted this coat pattern. The pattern comes in a neat little booklet, and has extensive instructions. I will be adding the tailoring techniques I have learned so far: bound buttonholes and padstitching the collar. The full length version, is perfect for winter, with the addition of longer sleeve. 

The gorgeous blue wool is from Mood, thanks to a gift certificate from my In-laws. For the lining I chose an off white sunback satin material, a suggestion from Gertie's latest coat sew-along. One side is satin, the other is some kind of flannel for warmth, no need to interline! I also got some off white faux fur for some accents. The buttons are from Pat's Custom Buttons and Belts, in Lodi Ca.  I love getting custom buttons from her, they always look perfect, such a speedy delivery even though it's across the USA, and they really make projects look more professional. These buttons only cost me about $13.  I LOVE buttons! Anyone else feel the same?

The wool is going in the dryer to shrink, but I'm not sure how to pre-wash the satin, any suggestions? It's cold outside today, I've got to get started on my muslin!


Pin It Now!

Monday, January 30, 2012

Take a Peek Inside my Coat

A few weeks ago I presented my finished coat: Vogue 8548. Some of you lovely readers requested to see the inside. Well here it is, better late than never, right?


Pin It Now!

Tuesday, December 13, 2011

Finished Coat! Vogue 8548


TA DA! My finished coat. My version of Vogue pattern 8548. I love this coat, it is so warm and cozy. It is completely interlined with lambswool, and lined with a bright blue china silk. I also ordered some custom buttons from Pat's Custom Buttons and Belts. A lot of tailoring went into this coat, the entire inside is stiched with hymo which helps the coat keep its shape.

I added a third button to the pattern, at the top, which keeps the wide neck in place. Pockets are a neccesity on a winter coat, so I also included some in the coat. This color combo in the houndstooth is so great, tan and white, it is a true neutral. All my other coats are wild colors so a nuetral color was good to make, it goes with all my purses, shoes, hats and gloves. I will be wearing this all winter.


See the inside of the coat here
Pin It Now!

Friday, November 18, 2011

Houndstooth Coat Progress


I've been a very busy girl. The outside of my coat (vogue 8548) is done. I've been following all the tailoring techniques from the famous book Tailoring: the Classic Guide to Sewing the Perfect Jacket, (which apparently has a new edition out, but looks the same). Here are some of the techniques I used:


See! The inside is not as pretty as the outside.


Added hymo to the bodice portions, bound buttonholes and staytaped the neck edge.

Catchstitch the seam allowance down

Set in sleeve using a bias strip of lambswool (which worked out great)
Back Stay out of hymo, and twill tape on back seam
I also added pockets, and interfaced the rest of the coat with weft, because the fabric had such a loose weave. I've also run out of lining fabric while cutting my last piece out, the sleeve! Now I have to find something else to use. The fabric I had was a blue china silk that I ordered form Mood online, but when it came i was not happy with the quality. I have to find something that will match the pockets, because I am not ripping all that out. I've run just a bit short on the lining and the outer on this coat, so if anyone is also making it, make sure to get extra!

Pin It Now!